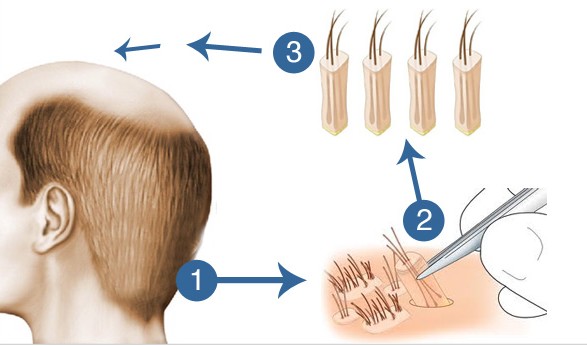
1. Trimming hair & Marking hairline
The doctor will brief you about the procedure and he will then finalize the details of your procedure goals, using a pen to indicate the treatment areas, hairline location and shape. After you confirm the marked hairline, your hair is trimmed to 1–2 mm length.
2. Anaesthesia
The patient lies in the prone position on the operating table and is given local anesthesia to numb the donor area. This will ensure that you are completely comfortable during the removal of the donor hair.
3. Extraction of follicular units
The grafts are then extracted from the donor area with the help of special micro–punches.
• A punch is placed directly over an individual follicular unit and following the angle of the emergent hairs, the punch is passed partially through the dermis.
• Once the initial advancement is made, the bulk of the follicle is pulled with forceps, literally “extracting” the follicular unit from the scalp.
• The extracted grafts are then preserved in saline or cool Ringer’s lactate solution.
4. Implantation of follicular units
In this phase of the procedure, the follicular units removed will be implanted, in the recipient area after giving local anaesthesia. The doctor who implants the follicular units defines the depth, angulation (inclination) and direction of growth of the hairs when implanting each follicular unit.
Implantation on the hairline will be made towards the end and before completing the procedure the patient is given a chance to see his final hairline and suggest any corrections. The
surgeon will make such modification based on the patient’s need if necessary based on the availability of the Grafts.
5. Post procedure briefing
Once the implantation is over, the doctors or the nurse informs you
about medicines to be taken and how to take care of your scalp for the next few days.

… [Trackback]
[…] Find More to that Topic: hairocraft.com/blog/what-happens-during-an-fue/ […]
… [Trackback]
[…] Info to that Topic: hairocraft.com/blog/what-happens-during-an-fue/ […]
… [Trackback]
[…] Info on that Topic: hairocraft.com/blog/what-happens-during-an-fue/ […]